I was stumped. I had no idea, not even a glimmer of a clue.
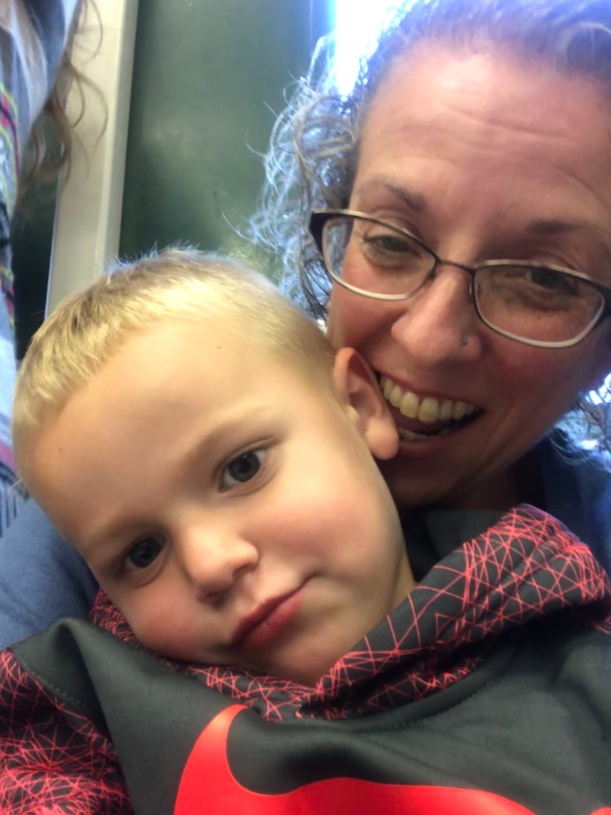
This boy, along with his other 4 cousins/siblings, have been my captive (literally) audience over the years as they ride in the Nana Bus (my white 4-door Mazda 3) They all know the song about riding in the Nana Bus. And they have all been victim to my silly songs and antics during forced participation car trips around the city.
But the sitting song? When had I ever sang a song about sitting? We tried several, but no, not it.
“Sitting on my lap, sitting on me,” he finally said in frustration.
OHHH. “Willaby Wallaby Woo?”
“YES!”
So we sang:
Willaby wallaby woo, an elephant sat on you!
Willaby wallaby wee, an elephant sat on me!
Willaby wallaby wAGE, an elephant sat on GAGE,
Willaby wallaby wANA, an elephant sat on NANA.
Continually, we added cousins, siblings, parents. This song can go on forever. Like the song that never ends.
When I was finally able to quit singing the sitting song, he continued to talk. Nonstop. This chatter about a wide variety of topics, including many repeats, went on for at least an hour. I am not kidding. It started at home during play, kept going during our drive, and did not stop even when we finally met mommy for the hand-off.
I was dying and mommy was laughing because he does this up to bedtime and she has a hard time getting him to STOP talking. Just like his mommy. Wait. Just like his Papa, over filled with words and must get them out. ALL of them.
Here’s wishing you many good times singing sitting songs and chatting with the littles in your life.
Happy book birthday, Laura and Jennie! What an adorable picture book! I know I can’t wait to get my hands on it and read about Porcupine and friends. And I hear there is a great pie recipe at the end, so let me at it!
Congratulations!
Note to writers: This interview is chock full of information about the Laura’s publishing journey. I loved learning more about the process.
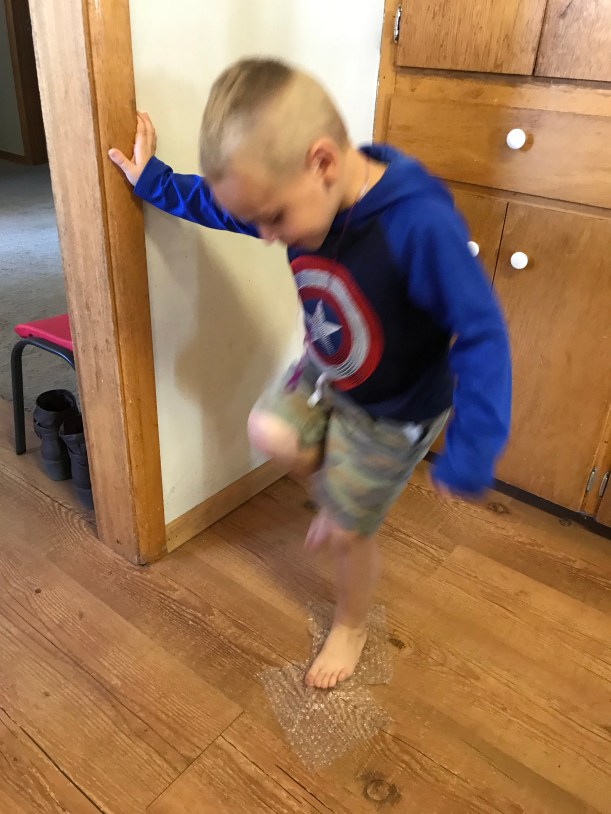
This post is NOT about wrapping preschoolers in bubble wrap. But it is about how much fun tots have popping bubbles.
Today during a sorting marathon, I discovered two small boxes filled with hand-sized rectangles of bubble wrap. Bubble wrap became the seed of creativity for my two young charges.
First, the fine motor skills used in attempting to pop the plastic bubbles brought intense concentration. Next came sound effects-boisterous shouts for each successful popping noise. And after introducing the ‘stomp-til-you-pop’ game while standing on the kitchen floor, squeals of joy and excitement filled the house.
30 minutes. That’s the minimum time they spent focused on small squares of bubble wrap. Moms, I was able to complete several tasks while supervising the giggly kiddos.
Mom tip: Get (save) bubble wrap!
Other activities to do with bubble wrap:
– use bubble wrap taped to a cardboard tube to make a paint roller
– add bubble wrap to cardboard strips to make bumpy roads for toy vehicles
– experiment with the protective properties of bubble wrap (drop an egg?)
– press bubble wrap in play dough or damp sand to make prints
– add bubble wrap to doll beds for mattresses (tape securely with duct tape)
– cut bubble wrap to fit inside a freezer gallon ziplock bag; seal with duct tape; let younger tots pop bubbles through the bag
– make bubble wrap shoes and walk around outside to see how well they work
CAUTION: Always supervise any play with plastic. Keep plastics and bubble wrap away from faces and mouths.
It might be noisy, but bubble wrap fun will be music to your ears.
Not THE Jimmy Hoffa, but my own skin-less, flesh-less version.
One quarter during my junior year of college at Western Washington University, I had the BEST science course! I loved that class. We determined our own grades by the project choices and number of selections we made on a preset list of assignments. Since I was always aiming for top grades, I made high marks my goal.
The final choice (between getting an A or a B) was removing the flesh from a small rodent to expose the skeleton. Actually, there was a second choice, but I don’t remember what it was. I spent many intense moments in consideration as I walked to and fro across campus. Choice A or B? I just had to do that final project to push myself to an A.
As I was wavering on how to get a rodent (rat or mouse) and how I was ever going to ‘kill’ it in order to dissect the flesh/skin/fur from its’ skeleton, I practically stepped on a rat. I was racing to class, when BAM, there was a barely moving rat lying on the pavement right outside my dorm! It was up against Old Edens, a gorgeous brick, ivy-covered behemoth of a building. I think the poor thing fell off and brained itself. Barely breathing or moving. Four feet in the grave.
Should I or shouldn’t I??? Choice A? I had to choose A when the opportunity presented itself. Nearly late, I raced to my room, grabbed a plastic bag, ‘rescued’ the rodent from the cement, put it in the dorm freezer, and headed to class. I really don’t think it was going to come around, so slowly freezing to death seemed pretty humane to me.
Now I was in possession of a full-sized dead frozen rat-sicle. In. The. Dorm. Freezer. (Don’t tell anyone, I’m sure there were regulations against it.) Time to earn that A.
How to Make a Rat Skeleton Display
1. Borrow science tools and remove as much of the ‘not bones’ parts as possible. This was a bit tricky with the tail and tiny toes, not to mention the dull scapel.
2. Attach rat skeleton (in my case, Jimmy Hoffa) to a piece of balsam wood to hold it in one position. I used straight pins.
3. Take rat skeleton to a flesh-eating insect colony. I also had the choice of boiling off the flesh, but ew. If frozen rat in the freezer in my dorm was bad, the smell of cooking rat would have been much worse! Besides, the tiny bones would have fallen apart or dissolved.
4. Let rat skeleton spend a minimum of one month in the insect colony.
Research Tip: I have no idea which type of insects Jimmy really visited, but best guess is a colony of dermestid beetles. Which, according to this post, can pick a skeleton clean in one day. No idea why Jimmy had to stay away from home for a month.
5. So, Jimmy went on a little trip to the flesh-eating insect container. There Jimmy spent a month of so while hundreds, or thousands, of little bugs combed his bones, picking off and eating leftover bits my scapel refused to move. He was almost perfectly clean when I picked him up from the vacation in Bug-Land. After writing an eye-witness account of his travels, I presented Jimmy and his journal to my professor.
Ta-da! I was awarded an A for my work in the science course. And I got to keep Jimmy. Where he lived in a ziplock bag for years until I couldn’t think of anything else to do with him and tossed him out. Poor Jimmy.
There you have it! Should you want to de-flesh a rodent skeleton, just find a colony of those flesh-eating bugs.
What crazy projects did you complete during your educational years?
This excellent post provides great questions to consider if you are writing a picture book that just won’t come together or lends itself to longer text (chapter book). I hope this helps you as much as it helped me!
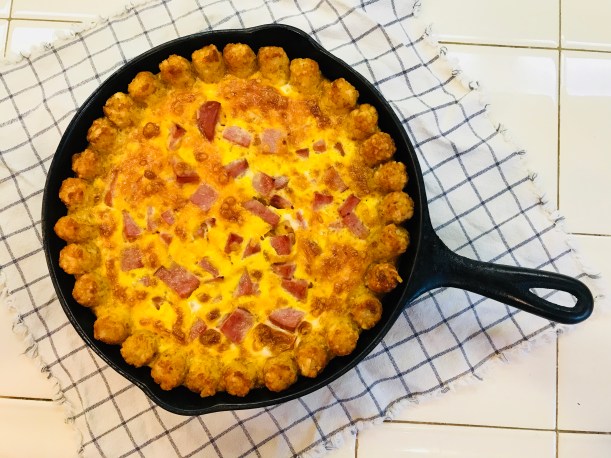
Compliments of my cousin, Melissa, we enjoyed her cast iron skillet breakfast casserole. So mouth-watering, fragrant, and tasty! I can’t wait to play with the recipe when I get home.
Cast Iron Breakfast Casserole
Ingredients:
1 package tater tots
1 dozen eggs
1 cup diced turkey ham (or your ham choice)
1 cup grated cheese
salt and pepper
butter
Directions:
1. Preheat oven to 375 degrees.
2. Generously butter inside of seasoned cast iron skillet.
3. Line bottom and edges with tater tots.
4. Sprinkle ham over tater tot crust.
5. In separate bowl, whisk eggs until well combined. Add salt and pepper to taste and mix. Pour over ham and crust. (Cayenne would be great, too!).
6. Sprinkle cheese on top.
7. Bake in oven. Start checking at 45 minutes by jiggling pan for movement or sticking fork in center for doneness. We like a crispy crust, so ours cooked for about 1 hour.
8. Remove from oven. It will continue to cook for a bit more. Slice and serve while warm. Delish!
Optional toppings: salsa or ketchup (for the youngers, not me), chopped green onions, sour cream, Tabasco. I’d like to experiment with green peppers, green chilis, spinach, broccoli, kale, and cherry tomatoes, though not all at once. Mmm.
Thanks, Melissa! I am inspired to re-season my cast iron skillet and whip up some breakfast casserole!
January 1971. My daddy and me, posing in our 70s single-wide mobile home trailer. I just turned 8 years-old.
Purchased brand new, our goldenrod and white 4-mile long mobile sparkled. Shag carpet, wood paneling, avocado/gold/rust colors, 2 bath, 3 bedroom, open concept living room kitchen dining room combo. Family of 6, plus assorted dogs, cats, birds.
It worked, this stylish model. I have so many memories of Christmases, birthdays, meals, chores, crowded rooms. This mobile home was truly mobile, as it moved from the original park in Huachuca City, to Presidential Estates further from town (moved twice while there), and then to the White Mountains. As a kid, it looked fine. But I’m sure the poor thing degraded with every move.
Dad eventually added built-in couches (convenient storage) and a full-size wood stove. Seriously! That stove kept us toasty warm in the White Mountains, come whatever snow and ice and frigid temps the season delivered. By the grace of God, we did not burn up in that mobile.
The girls scored with the bigger bedroom at one end of the trailer, mainly because we were older and bigger. The boys, including baby James, didn’t take up as much room. Both bedrooms connected to a central bathroom. Bunk beds gave us space and plenty of personal area, plus opportunities for causing havoc doing things like kicking up the bed from below or spilling liquids on the lower bunk resident.
One of my favorite memories of the top bunk, besides having Cry (our cat) crawl beneath the covers and sleeping cozied up to me, was looking out one winter night. I don’t remember what woke me, but it was probably coyotes or such. Snow covered the ground and the moon was full. I could read a book in that light! It was gorgeous and I kept the curtains open so I could continue to enjoy the feeling of being right out there in the middle of the night. The windows began just below the level of the upper bunk, so I really was floating out in space.
Others fond memories included my horse, Blaze, wanting to come inside. Why not? After all, the four of us kids, mom, dad, the cat, and the dog were nice and comfy. She just leaned up against the steps, sticking her entire head and neck through the door to see what was what. Whichever animal needed a little TLC was welcomed in. Kids (goats), rabbits, chickens, ducks. Poor mom! I imagine we created a disaster of mud, snow, dirt, footprints, grass, food, poop…
In this picture of daddy and me, he is standing right in front of a painting my parents had done of him. Handsome cowboy! I don’t remember him ever riding a horse – other than the 4-wheeled variety. Engines were his babies. He was a parts man who could rattle off part numbers and outrun anyone else in the department to locate specific items needed to repair vehicles.
Notice our caterpillar (sign of the times) and the record player and complete collection of country western music LPs. We. Were. Stylin.’
What do you remember about the 70’s? Were you even born then? The good old days.