I just completed stocking number 5. Or 11, depending on how far back you want to go.
Autumn, the youngest grand princess, wore her Christmas stocking just in the nick of time, since all other stockings are hung by the chimney with care, and mommy and daddy were patiently waiting for Nana to finish sewing for the fourth family member.
Christmas is a very short time away, right?
Making Christmas stockings became a tradition as soon and my honey and I were married. I strip-pieced matching stockings for both of us about 31 years ago. They have been used every year, except this one, when they are hiding in storage. And maybe next year, which will most likely be the same.
After each of our two children were born, I made them giant strip-pieced stockings. Somewhere (again, in the storage unit) are pictures of them wearing their stockings. As adults, Taylor and Chelsie both have their stockings in their own homes. Spouses (and child-of-our-hearts) received their own stocking. All that was missing were the baby pictures in stockings, but, well, they are just too big to wear them!
Jump forward to the next generation of grands.
First came Hayden, our 4-wheelin’ boy. Nana got busy right away to make him a stocking.
Next came Khloe, Princess of the Blue Eyes. Nana stitched and sewed to get her set for Christmas.
Donavyn, the brown-eyed ducky boy, came next. Here he is wearing his stocking beside his baby sister. He barely fits!
Gage, little wild man, made his appearance over a year ago. Nana dusted off the sewing machine and created his stocking.
And finally, Autumn. Last winter, when I was making Gage’s stocking, I cut out the base for another stocking, since we knew grand number 5 was on the way. Good thing for me, as we didn’t know we would soon be shoving all of our belongings into a tiny storage unit. When my Christmas senses kicked in, all I had to do was pull out the trunk with my fabric, dig out the stocking base and Christmas fabric, and I was reading to sew.
Stocking number 5. Or 11, depending on where you want to start counting. For us, it all began 31 years ago.
I know it’s cold in the RV. In fact, sometimes it’s Jack Frost icy. I realize that furry coats don’t always do the job in the warm-me-up department. I even acknowledge that though there are only 2 of you (and you are sisters from the SAME litter), touching each other often causes undo excitement, hissy fits, and flying bits of gray fluff.
We have a queen bed. In the RV. Crammed into a tiny alcove. Six-foot two-inch hubby requires most of the square footage available on said bed. That leaves me a tiny sliver, I’d even say the edge is my only slumber real estate.
I know we have an electric blanket. I admit to enjoying the toasty slide into pre-warmed sheets. The heater ducts blow comfortably hot air into our bedroom. This makes our room the most desirable location during long winter nights.
It also makes me be squished.
Sliver of bed. Closet alcove for darkness naps. Tall husband. Two cats.
Kitties. I have short legs. But even then, when you are both snuggled and sleeping like furry gray rocks along the bottom of the bed, I am left with nowhere to put my feet.
Out of the covers? Brrrr. Between you? This is one event where you allow yourselves to touch, even become glued together with your sibling. Beneath you? Your elephanty weight belies your small stature. Against the hubby? Uhm, his long legs leave no room. Up against your warm bodies it is then.
A ball. You will find me rolled on my side up near the outer wall of the RV. Sushi roll style, head wedged against the “dresser,” shoulders along the “headboard,” hands and knees tucked into the middle like bits of julienned carrots and radishes. The seaweed wrap of electric blanket coccooning me. And there the sushi mama roll will stay all night, on her less than 1/4 of the bed area.
You, my kitties, will have plenty of sleeping room. Purring contentedly, stretching at ease, lengthening and contracting with the rise and fall of space and temperatures.
Thanks for keeping us company and for blanketing our bed with your heat and snuggles. I don’t mind sharing with you. Not a bit.
Christmas was an important event for Christians in medieval Europe. Not just celebrated around December 25th, it began with the advent season at the end of November and continued through Epiphany o…
Here is a little medieval history about advent and Christmas. I loved reading it and comparing the now and then traditions we observe during Christmas. A special ending comes in the form of “O Come, O Come Emmanuel” played on a medieval Scottish harp!
This is a big deal. I know they’re all the rage right now, and are you not glad? We grew up with coloring books. Not the adult sort that is popular, but books featuring cartoon characters and now-iconic movie themes. Frosty, Rudolph, Tom and Jerry, Barbie…the list is quite long. And I’ve probably had at least one coloring book for each character.
Christmas and coloring books go hand in hand. Opening that freshly minted box of unbroken and pointy tipped crayons and deciding which picture to color in first – that was one of our growing up years Christmas traditions.
Our stockings always had an orange, an apple, and nuts. Add some assorted hard candies, never enough chocolate, small toys, coloring books, and crayons! I’m not sure we had the coloring books and crayons every year, but often enough that I associate them with Christmas morning and full stockings!
I carried on the tradition for our two children when they were young. Coloring books, crayons, chocolate, and candies. For some reason, I dropped the fruit and nuts, though now at my mature age, I view them as synonymous with Christmas stockings.
During college (yes, waayyyy before adult coloring books hit the market), my college friends and residents of the dorm I lived in often sat in the hallways with coloring books and crayons, happily coloring, visiting, and enjoying much-needed stress relief.
As an adult, I still have coloring books. I recently found a lovely nature-themed adult coloring book. I also have a journaling Bible, complete with multiple illustrations ready for me to color.
And today, I purchased old-fashioned coloring books – Rudolph, Frosty, and Santa. I just need crayons, apples, oranges, and nuts.
Because now I can pass along the coloring traditions to the grands.
Creamy tater tot casserole (without the tater tots)
Living in the RV, I am constantly challenged to adapt old recipes or create new combinations. With winter upon us, well literally in a few short days, plummeting temperatures – single digits next week! – care must be used when cooking in the electric skillet. As we creatively balance what can be plugged in, turned on, and vice versa in regards to heaters placed below the RV to maintain water flow, let me say the breakers have been tripped on a daily basis.
That being shared…here is a fun new way to make a classic.
RV Electric Skillet Tater Tot Casserole
(1 dish cooking)
Ingredients:
olive oil
1 onion, diced
2 carrots, diced
a small scoop of minced garlic
2-3 small potatoes, diced
1 lb. ground turkey
1 can cannelini beans, drained and rinsed
1 can cream of chicken soup
1 head broccoli, cut into small florets
1/2 cup frozen peas
Mrs. Dash, about 1 T.
black pepper, about 1 tsp.
dried sage, about 1 tsp.
crushed peppers, optional
chicken broth
grated cheese, optional
Directions:
1. Add olive oil to electric skillet and heat it to about 250-300 degrees. I constantly adjust my temperature setting depending on speed of cooking, so play with your temps.
2. Add onions, garlic, and carrots. Sauté until softened, about 5 minutes. Add turkey and cook until browned.
3. Add potatoes, cream of chicken soup, 1 can of water, and 1 can of chicken broth. Note: I like my casserole creamy as opposed to thick. Add more broth as needed to taste.
4. Add black pepper, crumbled sage, Mrs. Dash, and crushed peppers to taste. We love spice, so I am heavy-handed with the peppers. Stir, cover, and cook for about 5 minutes. Stir often.
5. Add broccoli, beans, and peas. Adjust liquid content with broth, again to taste.
6. Cook until all ingredients are heated through and potatoes are soft, perhaps 5-10 minutes more.
7. Serve immediately with grated cheese.
There you have it. Tater Tot Casserole without the tater tots!
Two fresh pine trees outside, one planted and one cut, both decorated with white lights and silver stars and well watered. One potted artificial tree with blue lights next to the door. That doesn’t cut it for me, the lover of all things Christmas tree. The inside of the RV was too bare.
But with 2 kitties, lack of floor space, and no extra counter space, what is one to do?
Get a tree anyway.
Welcome little plastic tree, pre-wired and covered with plastic ornaments. Thank you for lighting up our indoor Christmas space. I know the kitties can’t hurt you, though they try, and you can’t (shouldn’t?) break.
So again, welcome. How lovely are your tiny little fake branches and your cheerful glow!
3 trees – tiny in front, tall in the middle, and blue next to the door.
Outdoor Tree Update: The Christmas tree down count is 3 wind events, which equals 3 pick-up-the-tree-and-replace-the-stars outings.
How about you? How many trees do you have? Do you have to pet-proof your Christmas decor? I’d love to hear I am not alone!
There I was. Putzing around while my honey worked up a sweat digging out a fresh little Christmas tree. I couldn’t really help him, one shovel and all.
In our area, we can purchase a tree permit from the forest service and dig or cut a tree up to 15 feet tall. As long as we follow the rules of where and where not, we get to choose whichever tree we love!
The first tree ‘we’ loved was a beauty! Between 5-6 feet tall, symmetrical, gorgeous. Plans were changed and we decided to dig up this pretty baby (by we, I mean he) and immediately plant it in the pasture before the ground froze.
Uhm. 5-6 foot evergreen trees do not come with short and easy-to-remove-from-the-dirt roots. After probably 25 minutes of heavy duty grunt work, we told the tree we love you and grow well and strong and shoveled all the dirt back and tamped it down. The tree would not budge. It loved where it lived.
The results from this attempt made us decide to dig up a smaller tree. MUCH smaller.
We found a lovely, adorable little tree stuck on the side of a hill. It called out to us – “Take me home!”
So my honey started digging. We had expectations for a shorter dig time. This prediction did not account for the rock. We also planned on potting this cutie and enjoying it inside the RV and planting it later in the spring.
Except for the rock. And the huge curvy taproot wrapped around the rock that would have forced us to use a pot the size of a small car in order to cover it with soil. That sort of container does not fit in the RV.
Plan C. Bag up the cute tree which still required 15 or so minutes for extraction, and immediately introduce it to the new home in the pasture.
Our second tree, originally planned as a larger cut tree, then switched to “Let’s dig out 2 trees,” was then maneuvered back into the original plan after the digging marathons. A stately and fragrant tree became our cut tree.
One can never tell what is lurking below the surface. Rocks, roots, acres of soil – depth of stability, secure anchorage, ablility to withstand hurricane force winds or mountains of heavy snow. Baby trees face all sorts of dangerous conditions out in the wild. And each one causes the tree to grow stronger and more resilient, develop even deeper roots, and hang on tight.
I should have taken a picture of that root wrapped rock. As a reminder. But the mushrooms were calling and I didn’t realize the significance of the rock. It’s like that sometimes. Upon later reflection, insights swivel my viewfinder to see what’s truly important.
Sometimes I feel like a baby tree, stuff coming at me from all directions. I bend, shudder, and quake, tossed like a dandelion puff on the wind. But as long as my heart roots are wrapped around the Rock, I am safe and can rest in His care and protection. I can continue to grow and become stronger as I sink my roots deep and wrap them ever tighter around my source of strength.
The Rock.
“Let your roots grow down into him, and let your lives be built on him. Then your faith will grow strong in the truth you were taught, and you will overflow with thankfulness.”
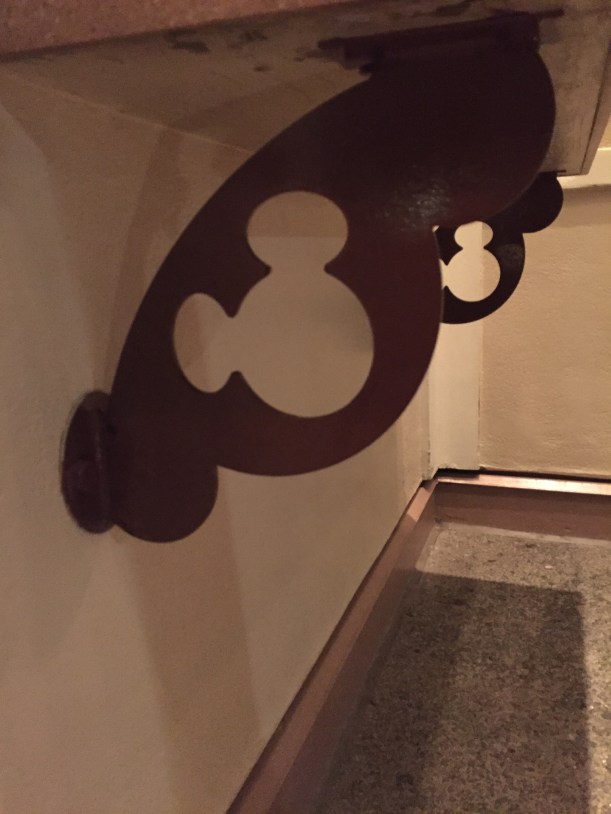
My husband and I recently enjoyed an anniversary trip to Disneyland and California Adventure. We enriched our experience (and even discovered new areas of both parks) by playing the Hidden Mickey Game. Here are 5 ways to play the Hidden Mickey Game.
1. There is a Hidden Mickey Game? Check this off the list! Now you KNOW there is a Hidden Mickey Game. You can’t play if you aren’t aware of the game.
2. Imprint your brain with the image of Mickey’s head and ears – very recognizable. There are also other full body images and side profiles of Mickey, but we spent our time hunting the head image. Train your brain to recognize this shape and you will discover it everywhere. Disney does this well.
3. Go Mickey Hunting. Look at fine details of hotel rooms (especially at the resort hotels), decor, carts, rides, artwork…every scene you see is a possibility. Even before you get in the front gate, you can find Mickeys in the central plaza. Document your finds! When we got home and looked at the photos I took, they were mostly hidden Mickeys!
4. Ask. Nearly every attraction or ride or area has an intentional hidden Mickey. We found cast members to be very knowledgeable and helpful in our hunt. Some told us exactly where to look while others gave hints. Some Mickeys are very easy to spot, others we searched and searched for on multiple attraction rides and could not see them.
5. Buy the book! Yes, there is a book. I didn’t want to purchase a book, as I felt it was cheating. But I finally caved and grabbed it. There are so many planned Hidden Mickeys, but also others that can be discovered. The book is older, so some Mickeys are gone due to new construction. And new Mickeys are added every time they create new attractions or remodel or update areas of both parks. The book was a huge help. On the plane ride home, I went though it page by page and jotted down the date we discovered each Mickey.
Extra Tip: Listen and watch. There are others searching out Hidden Mickeys. You can help each other once you are aware there is a game going on!
Adding the Hidden Mickey Game to our Disney adventure was fun, fun, fun! People looked at us as if we were a bit odd, but that only added to our excitement!