After my stamping buddy sent me her leftover kraft paper houses, I was inspired to dig out the stamping supplies and see what happened. Another friend from my teaching days had recently given me a stack of decorative papers. The ingredients from two friends plus my own collection combined to make the perfect recipe for these fun cards!
It is always a boost to start a new card project with ideas or the beginnings of the project. The houses and patterned paper were just right to kick off this crafting session.
I used thick cardstock, patterned paper, washi tape, sticky mesh, colored pencils, rubber stamps, ink, and a little glitter glue. I love the collage of all the materials. The creativity comes from playing with different pieces, rearranging them to find what works. I’m happy with the results. Nine houses, nine new cards.
One day last week I went back to work after a quick lunch and my computer had decided to do a long detailed update and I was locked out. Soooooo. What is a girl to do, standing there amongst all the rubber stamp supplies?
OH. She could most certainly dig out the most recent gifting of unused supplies (papers, stamps, extras) from a friend and see what card jumped out of the mix.
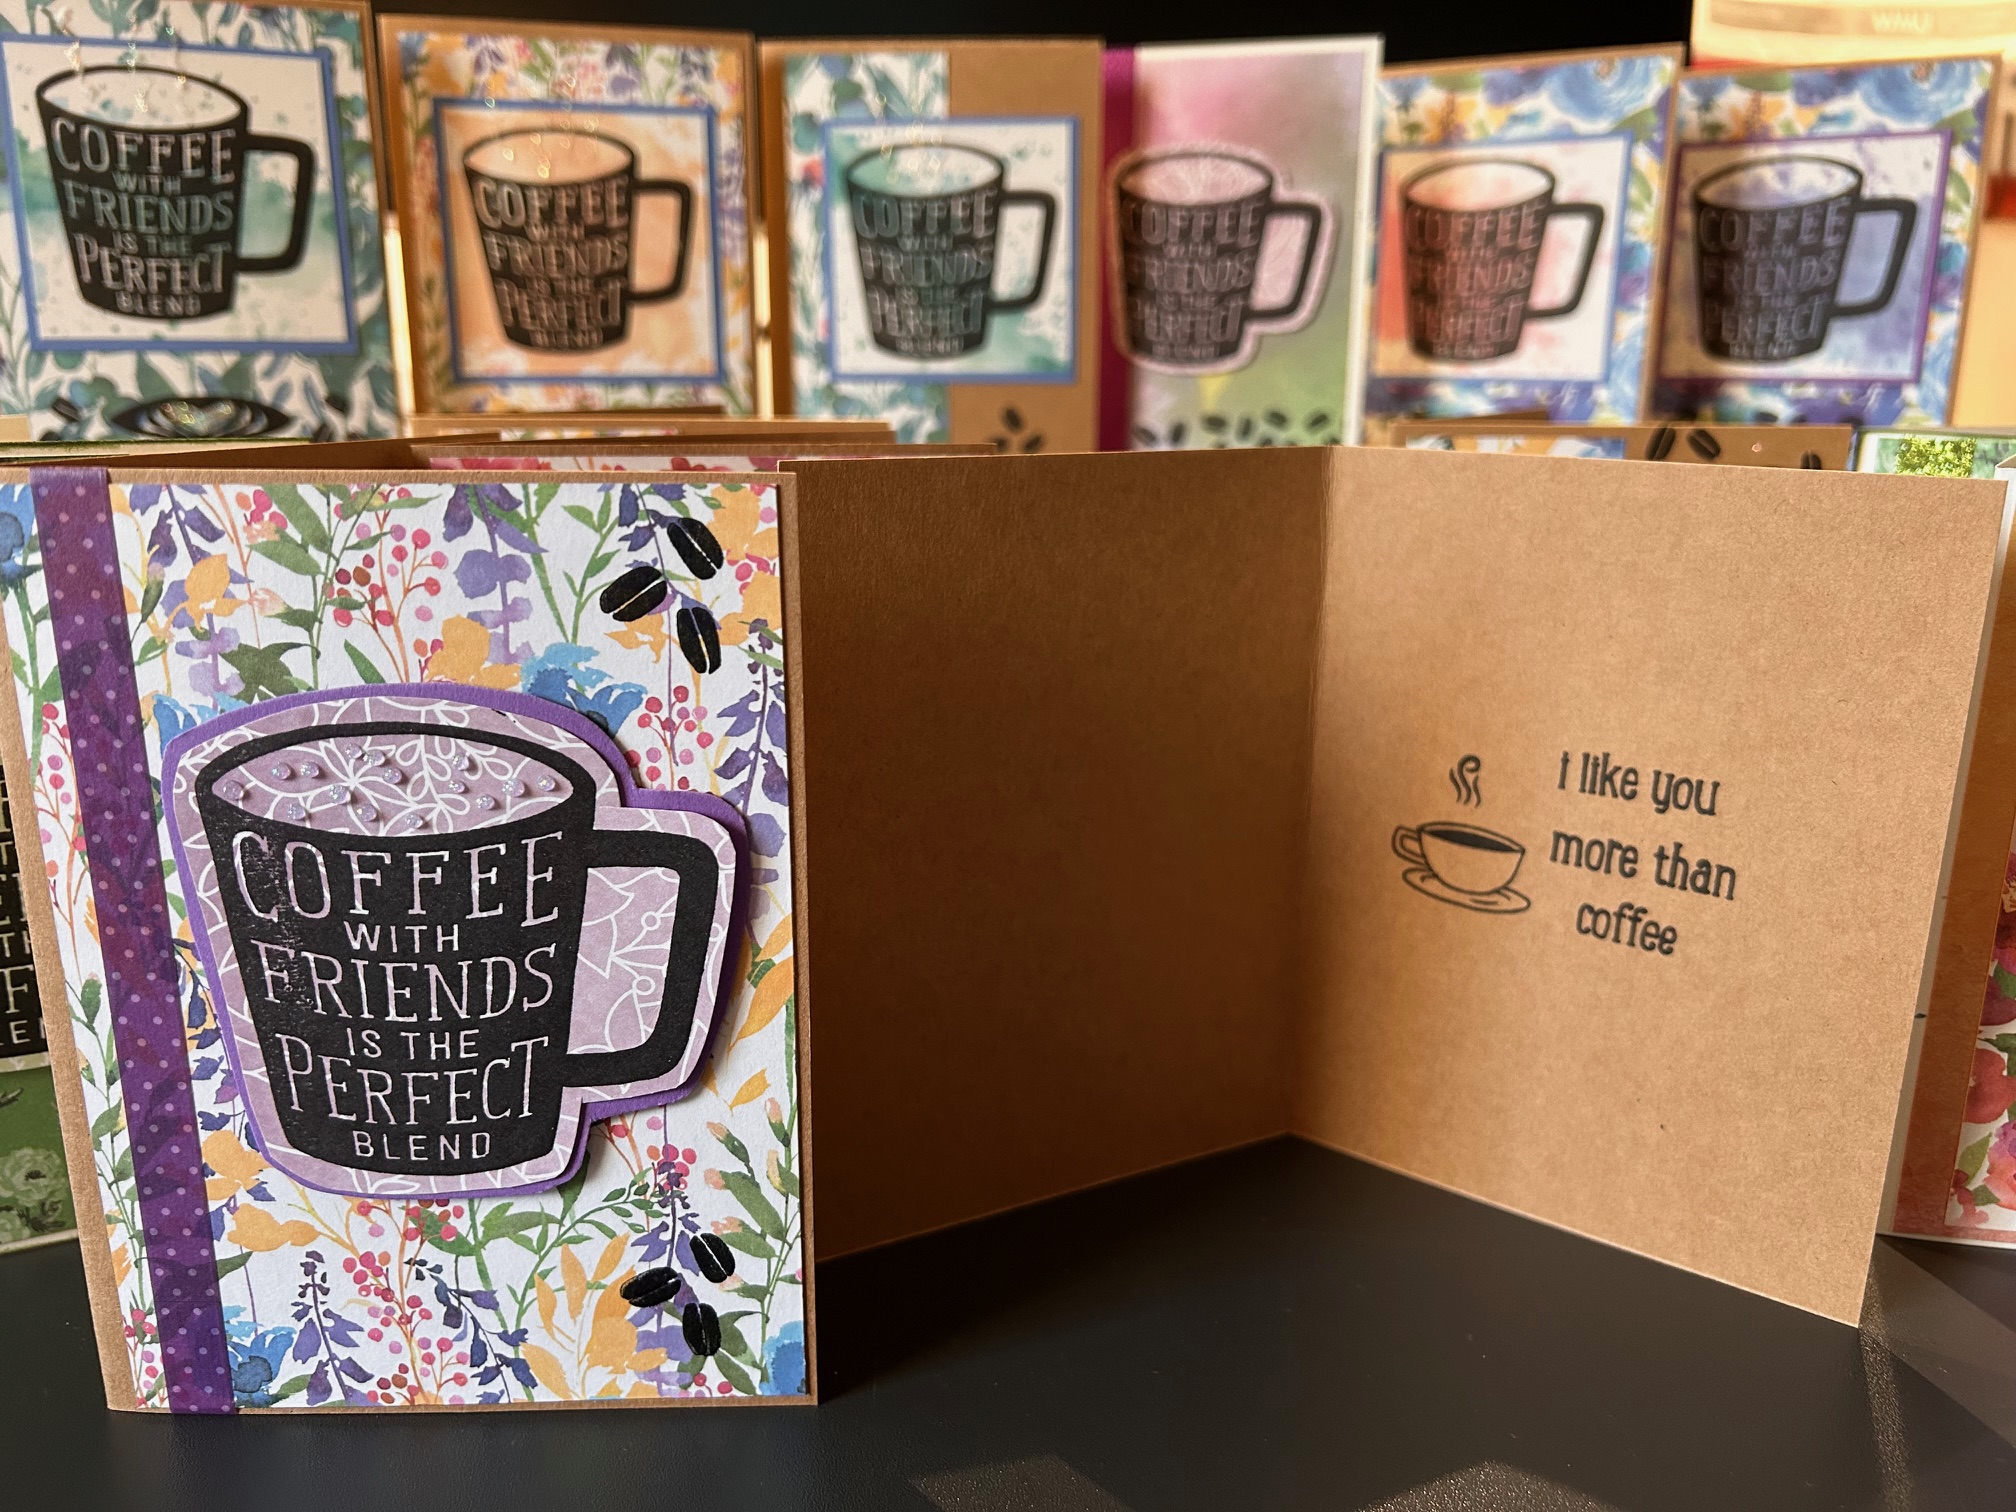
It was coffee. Coffee jumped out. This fun coffee cup rubber stamp set was just the thing. Add some fun papers, a bit of this and that, and 14 time for coffee with friends cards are now drying on my desk.
Not that they were all finished that first day. It took a few more chunks of time, but once the mess is out on the table and the idea has a plan, rubber stamped cards are just a few short work sessions away. I worked on them a little bit both days of the weekend, finally finishing them up in time to make dinner on Sunday.
How about you? What do you do when the computer locks you out or you have a few free hours? Any favorite hobbies? We could get coffee!
My weekend was not spent doing what I wanted (and had planned to do for oh so many hours). Winter Storm Cora derailed (de-planed?) my travel plans and flights to attend a wonderful weekend of friends, missions, connecting, sharing, and encouraging. Many of us were turned back and unable to attend.
But on the bright side, I flew to San Francisco for breakfast at the airport. Continued on to Denver for a late lunch/early dinner, and then (after flight cancellations), made it home the same day! Just a leisurely tour of three airports and planes. If you add in Pasco, WA, and look at a map, you will see I made a pretty neat triangle of adventure with my airplane rides. The picture above shows the Golden Gate Bridge as we flew over San Francisco heading to the airport.
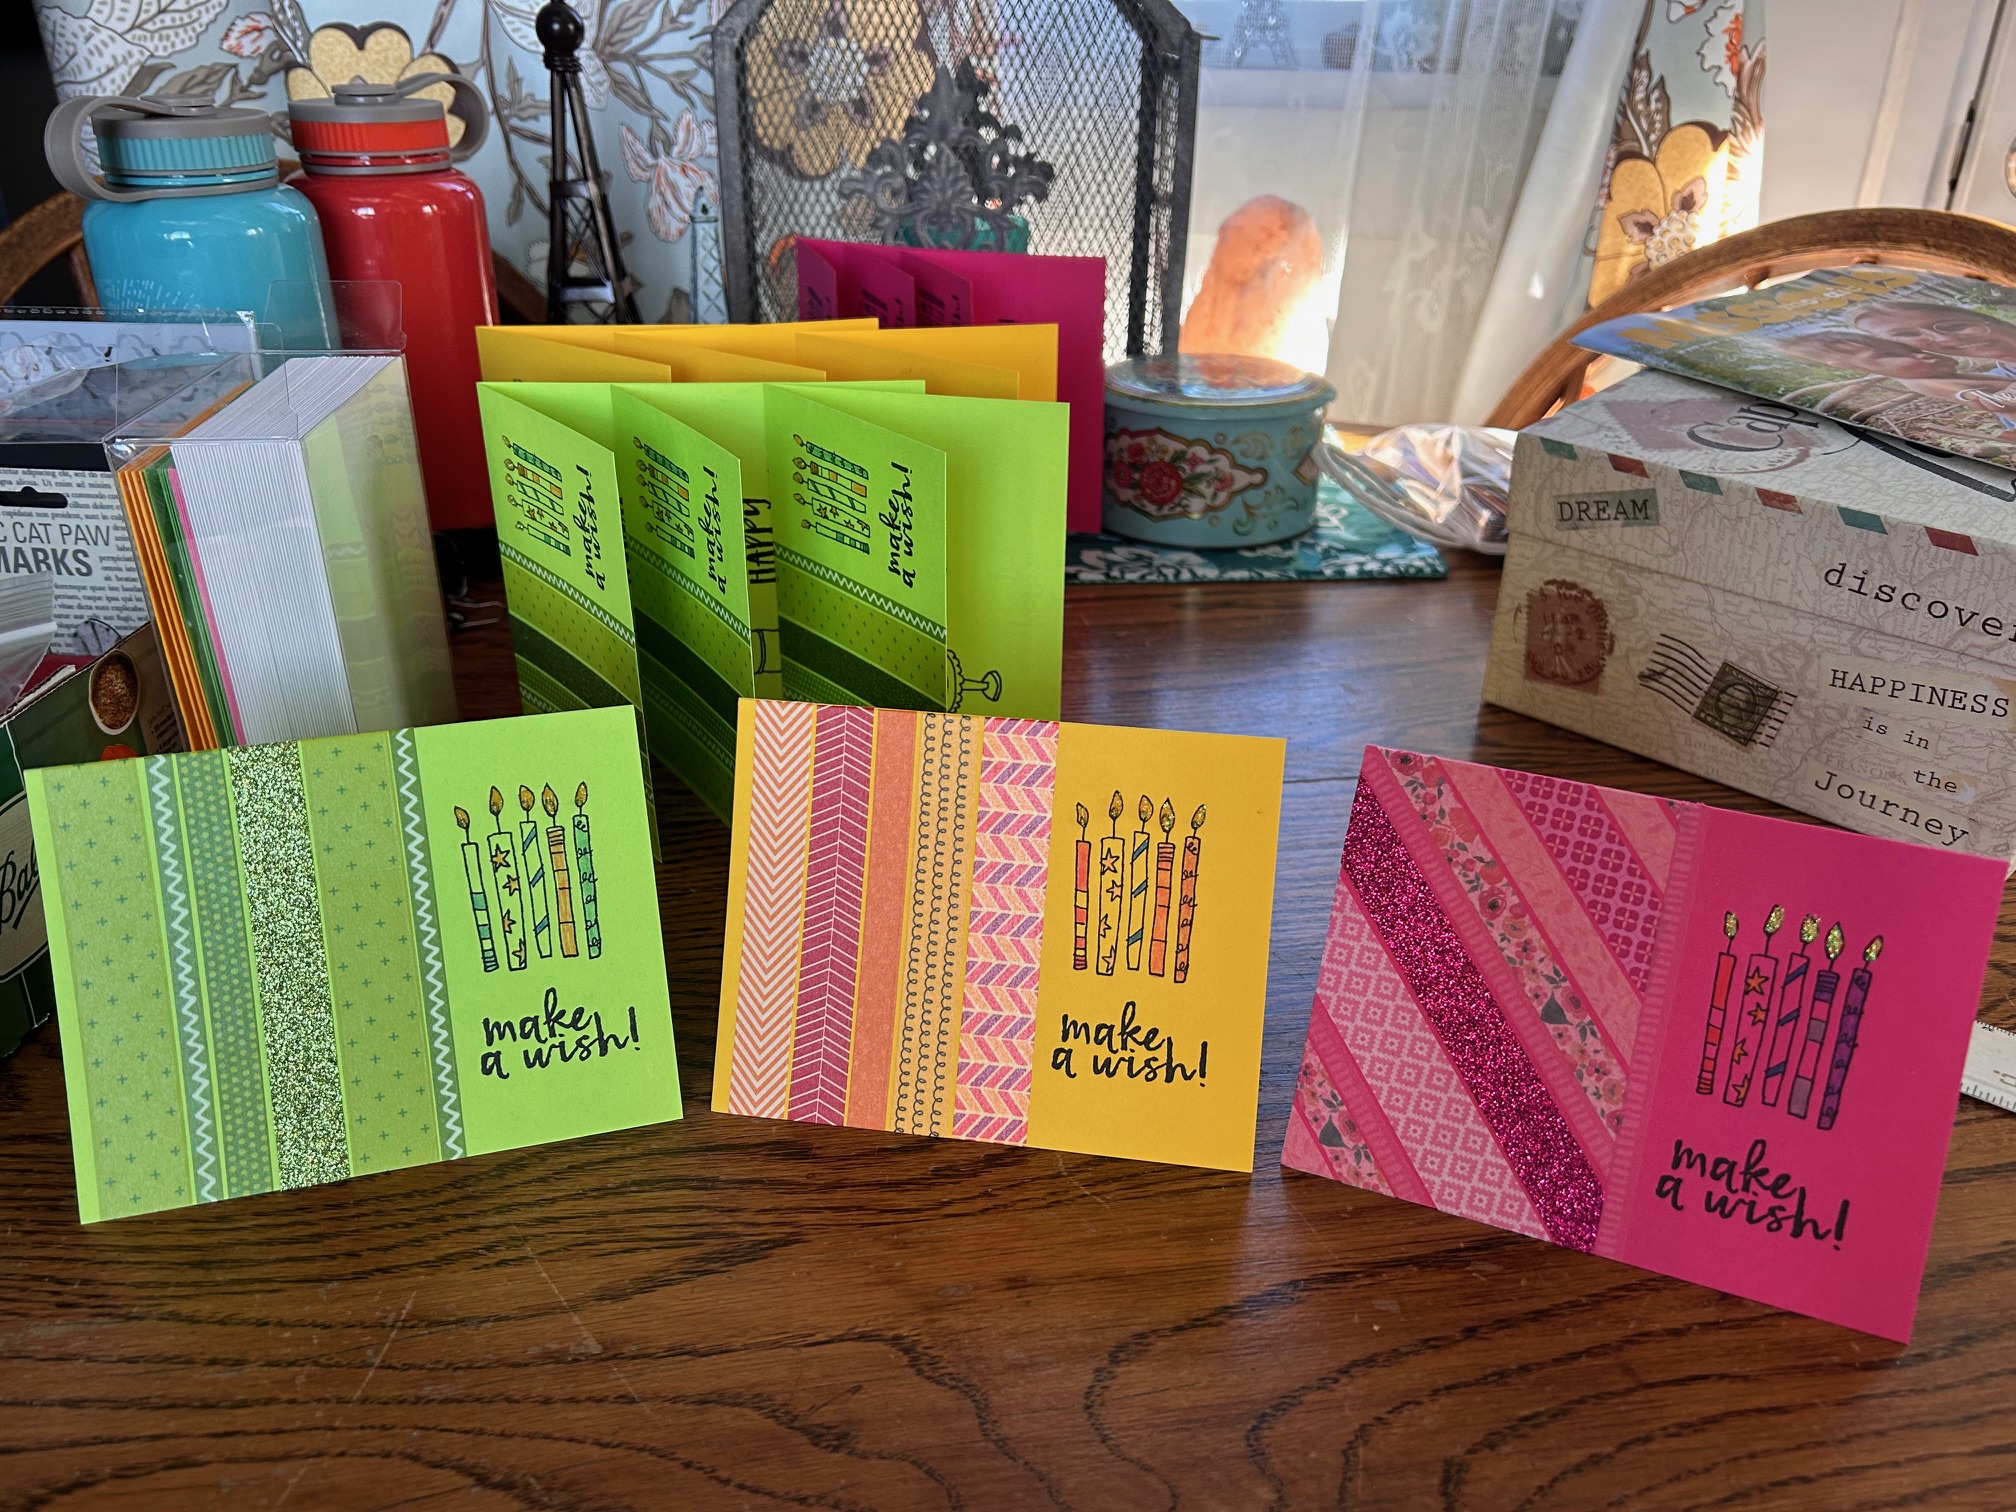
Come Saturday, when I was home missing the comradery, I decided I needed to do something fun and change my attitude. What better way for me to cheer up than making brightly colored birthday cards? Several bonuses here: I used up washi tape, created with some brightly colored cardstock that for some reason I have a hard time using, discovered that embossing anything was off the table (the 20+ years-old embossing pads were toast), and came up with a dozen new birthday cards!
One dozen rubber stamped cards is a great way to kick off a year in which I hope to create many more cards to add to my stash.
What about you? When have your plans been changed by circumstances beyond your control? What did you do to change your attitude?
79 cards, friends. 79. Not my best total after a weekend of stamping, but nothing to sneeze at either. 😉
I took up residence with my stamping buddy and her kitties over the summer and we got it done! Between the kitty help (all 3 of them), the walks, the meals, the outings, the visits, the Olympics, the rain (yes, glorious rain), I still managed to create 79 cards. My card stash (housed in those cute picture storage boxes) was getting low. Whew.
Here are the styles I worked on. Many of them are different from the top card, but have the same theme. We love to use up our “crafting stuff,” and no scrap is too small, no tidbit too uninspiring to be included for consideration.
I LOVE creating French-themed cards. One of my goals was to use up some of my French decorative paper. Check. [Hint: Even in rubber stamping, setting goals is a good thing to do!]
Another goal was to use up some tropical decorative paper. Plus, such cute pineapples!
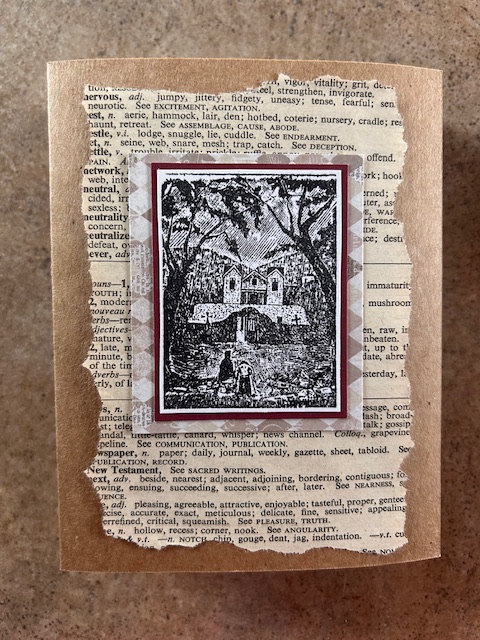
A surprise entry to the card collection took place when Alyson started using this interesting, location-specific stamp. Old thesaurus, patterned paper, solid cardstock. This stamp represents Santuario de Chimayo in New Mexico! I’ve never been there, but it looks like I should put that on the list.
This was a cute card to put together. Layers are how it works best, and you’ll notice that old thesaurus pages are one of my favorites to include. Actually, any aged pages from old books work. Though one must be careful to notice which words show up on the card.
I love these stamps! The background paper worked very well. Alas, this card was a lesson in which ink pad NOT to use! The ink never dried, so I had to carefully place scraps of paper between each card to bring them home. And then it still wouldn’t dry! I finally had to peel off the fronts, remove the backings, and re-ink the edges. Sigh. I just need to toss that ink pad. Black ink. Everywhere.
After the gloom and doom of black smeary ink, this summer card was quick, easy, and light!
A little music is good for the soul. It took a bit of time to cut out the guitars to pop on top, but the card was worth it!
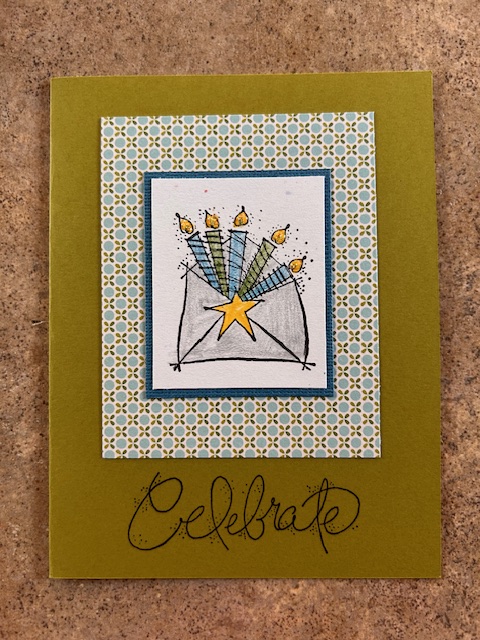
Fun stamp, fun text, fun colors! We all need something to celebrate, and this card works for so many special occasions.
I LOVE stamping! It works much better with a buddy (or two or three) so you can share supplies, ideas, thoughts, and suggestions. Of course, the mess multiplies by number of creators. LOL
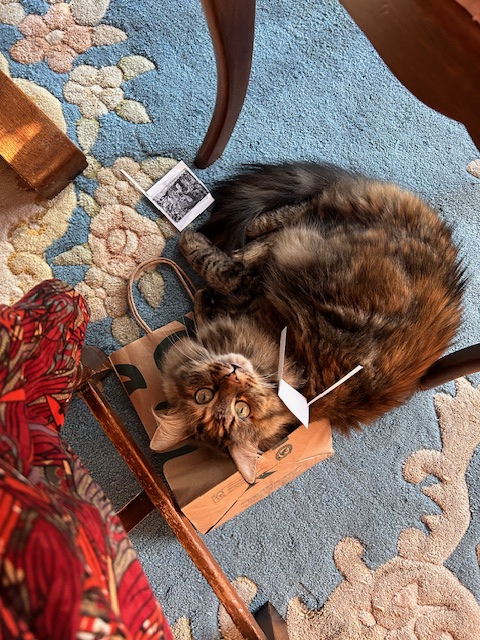
Can we count the kitties? Yes. I’ll leave you with one of our co-creators. This one loved the trash bag.
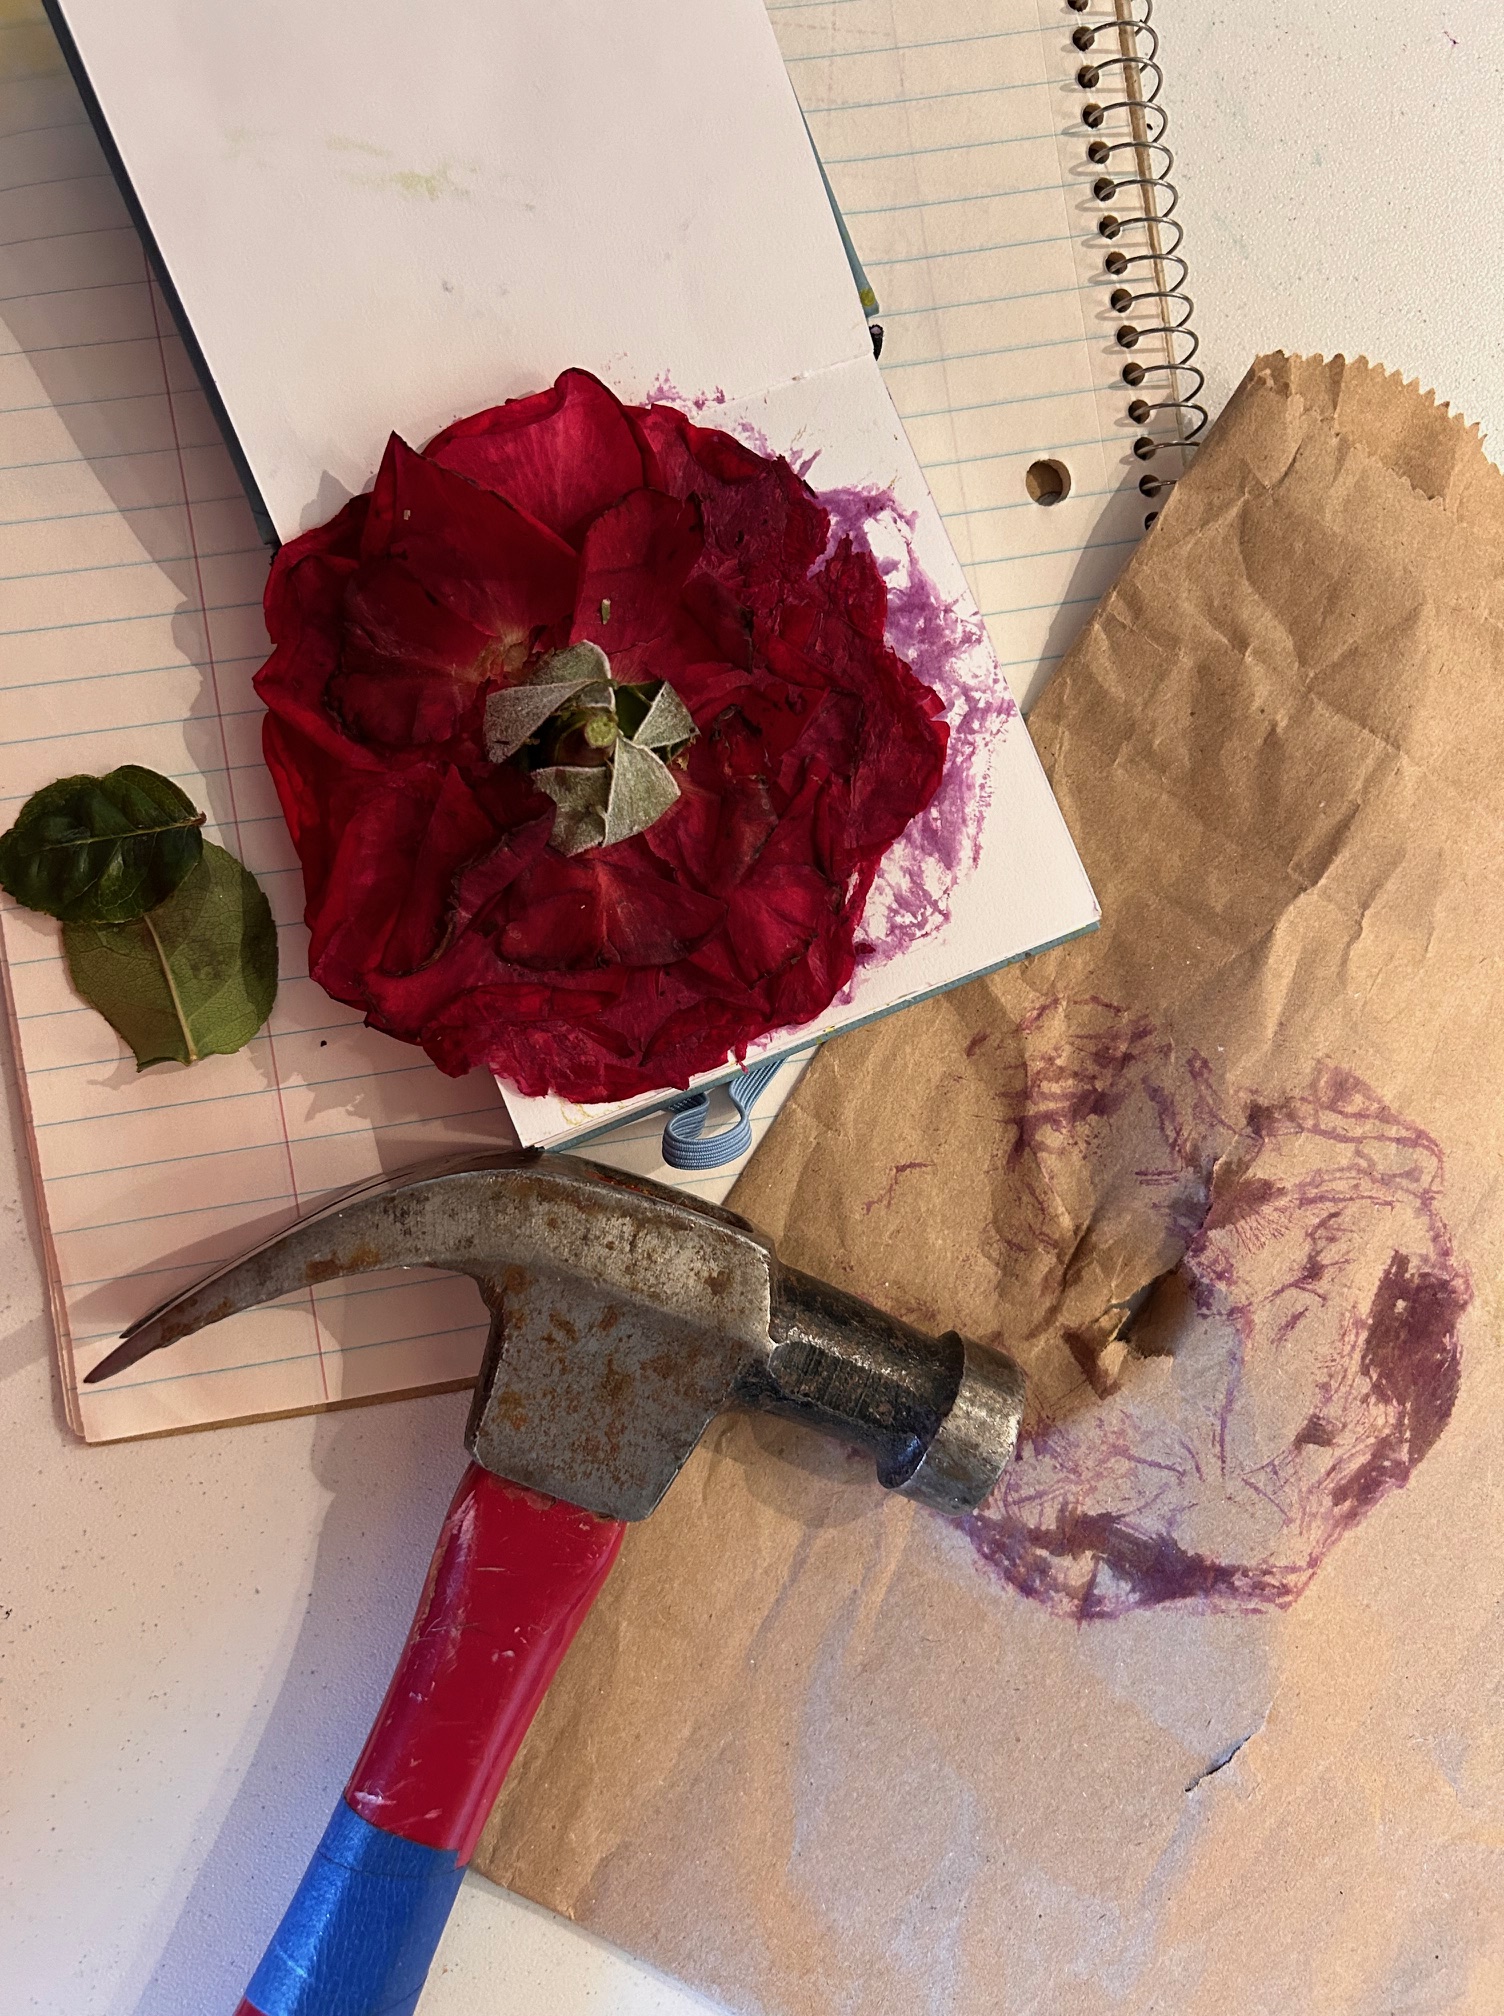
My pansies and Johnny-jump-ups are fading fast in this heat, so I took a few hours to hammer flowers. I also snuck in a red rose that was nearing the end, to surprising results!
I haven’t figured out how to keep them firmly in place once I start hammering. I think my table is not as sturdy as it should be, so the whole thing bounces. Whoops. But I am not hammering on my oak table! Bouncing it is.
They turned out so well! These are the only colors that are still flowering, despite my deadheading.
I did one page in my mixed media journal, combining a bunch of inks and “stuff.” And I experimented with card-sized cardstock, which turned out well, but it takes MANY flowers to fit on one of those (I did 5 card fronts). Hammering flowers is a workout! My honey was outside and thought someone in the neighborhood had their bass up too loud. LOL.
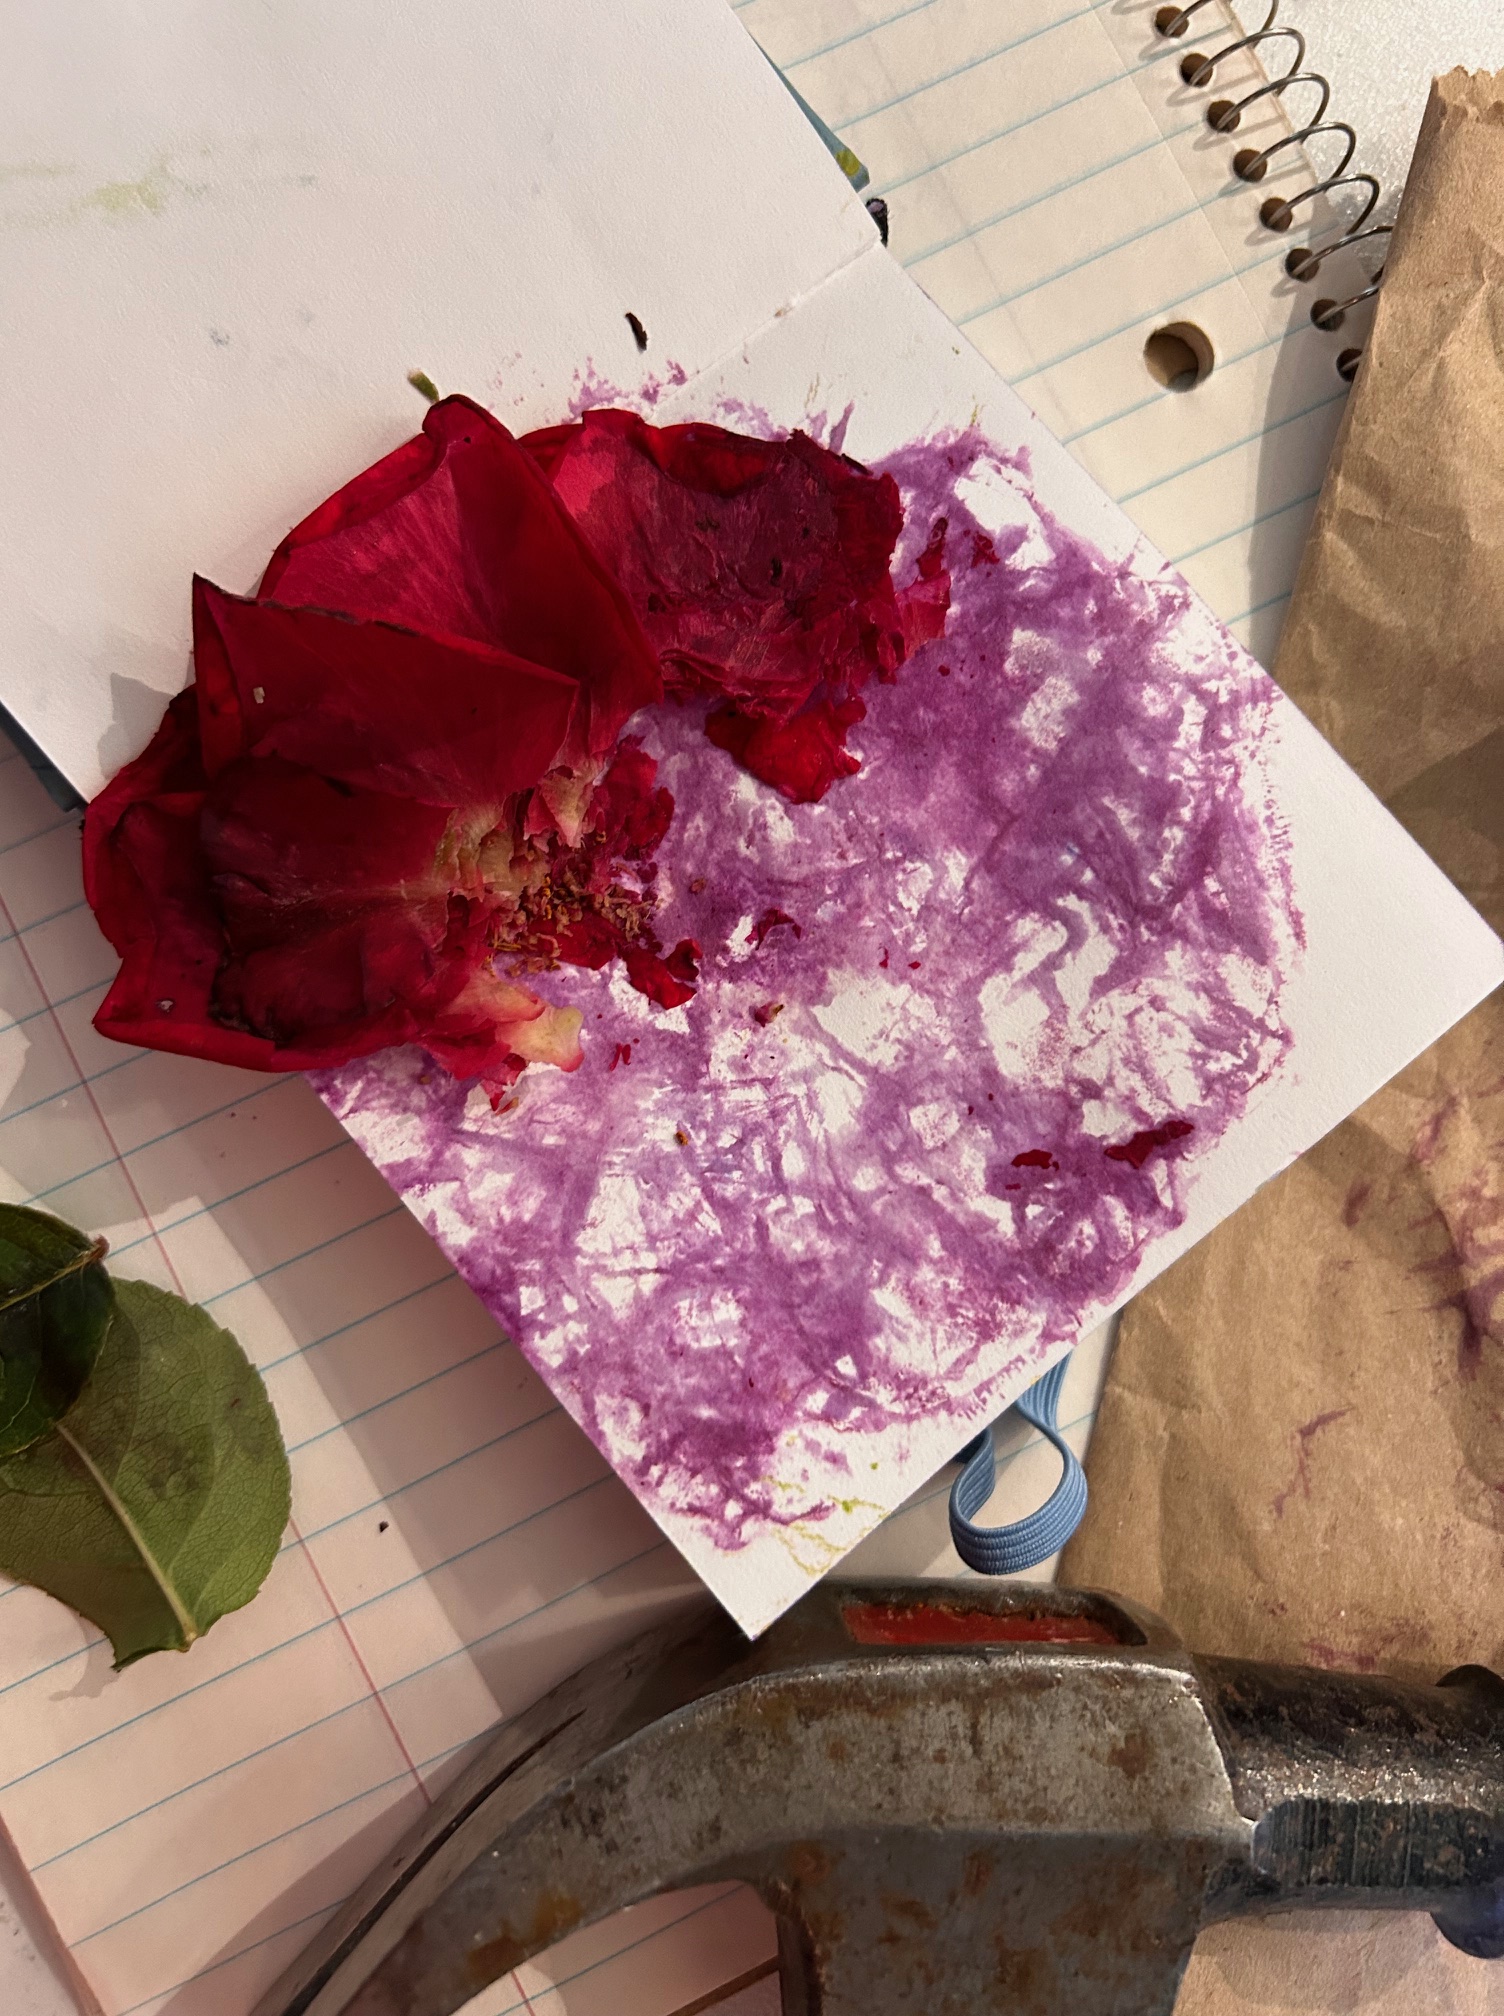
Just look at the surprising color I got from the red rose! I didn’t finish the page in my journal yet, but I was fascinated by the results.
The leaves did not leave any color at all. Too tough and thick.
I have some zinnias getting ready to bloom. I might experiment, but they are pretty thick flowers. Flower hammering. Experimenting is fun. Creating is FUN!
Here is what happened in round 2 of flower hammering. I tell you, pansies make great prints! I don’t have much else of substance blooming yet in the garden, but I’ll keep experimenting as the season goes along.
This is what the cover paper looks like after hammering.
I tried hammering this batch of flowers on paper I’d already added color to. It turned out very nice by the end, and the flower prints give great texture. But I was a bit disappointed that the prints did not turn out as well as I had hoped. At least the yellow/orange ones did not. You can barely see the stem I tried, and darker bits where I added leaves.
The poor smashed flowers.
Here is try number 2. You can see where the prints on the previous page soaked through, which is cool. There is some beneath my arranged flowers as well. The bleed through is at least 2 pages worth. This page is all white except for some bleed through. I crammed the flowers, leaves, and stem with the hope of getting plenty of color.
This is how the back of the cover sheet looks after hammering. Things tend to move around a bit. I start out with the cover paper straight, but by the end, it’s all twisted. It’s hard to hold it still and not hammer your fingers!
Oooooh, yes! This is where I’m getting results. Just look at those pretty pansy faces on the white background! You have to gently peel off the petals, or in some cases, just let them dry and rub them off. Bonus: The cover page also has wonderful colors! I’m saving that for another project.
I LOVE this! I haven’t done anything else with this flower hammering page, but the ideas are brewing. Growing? Smashing? ;0
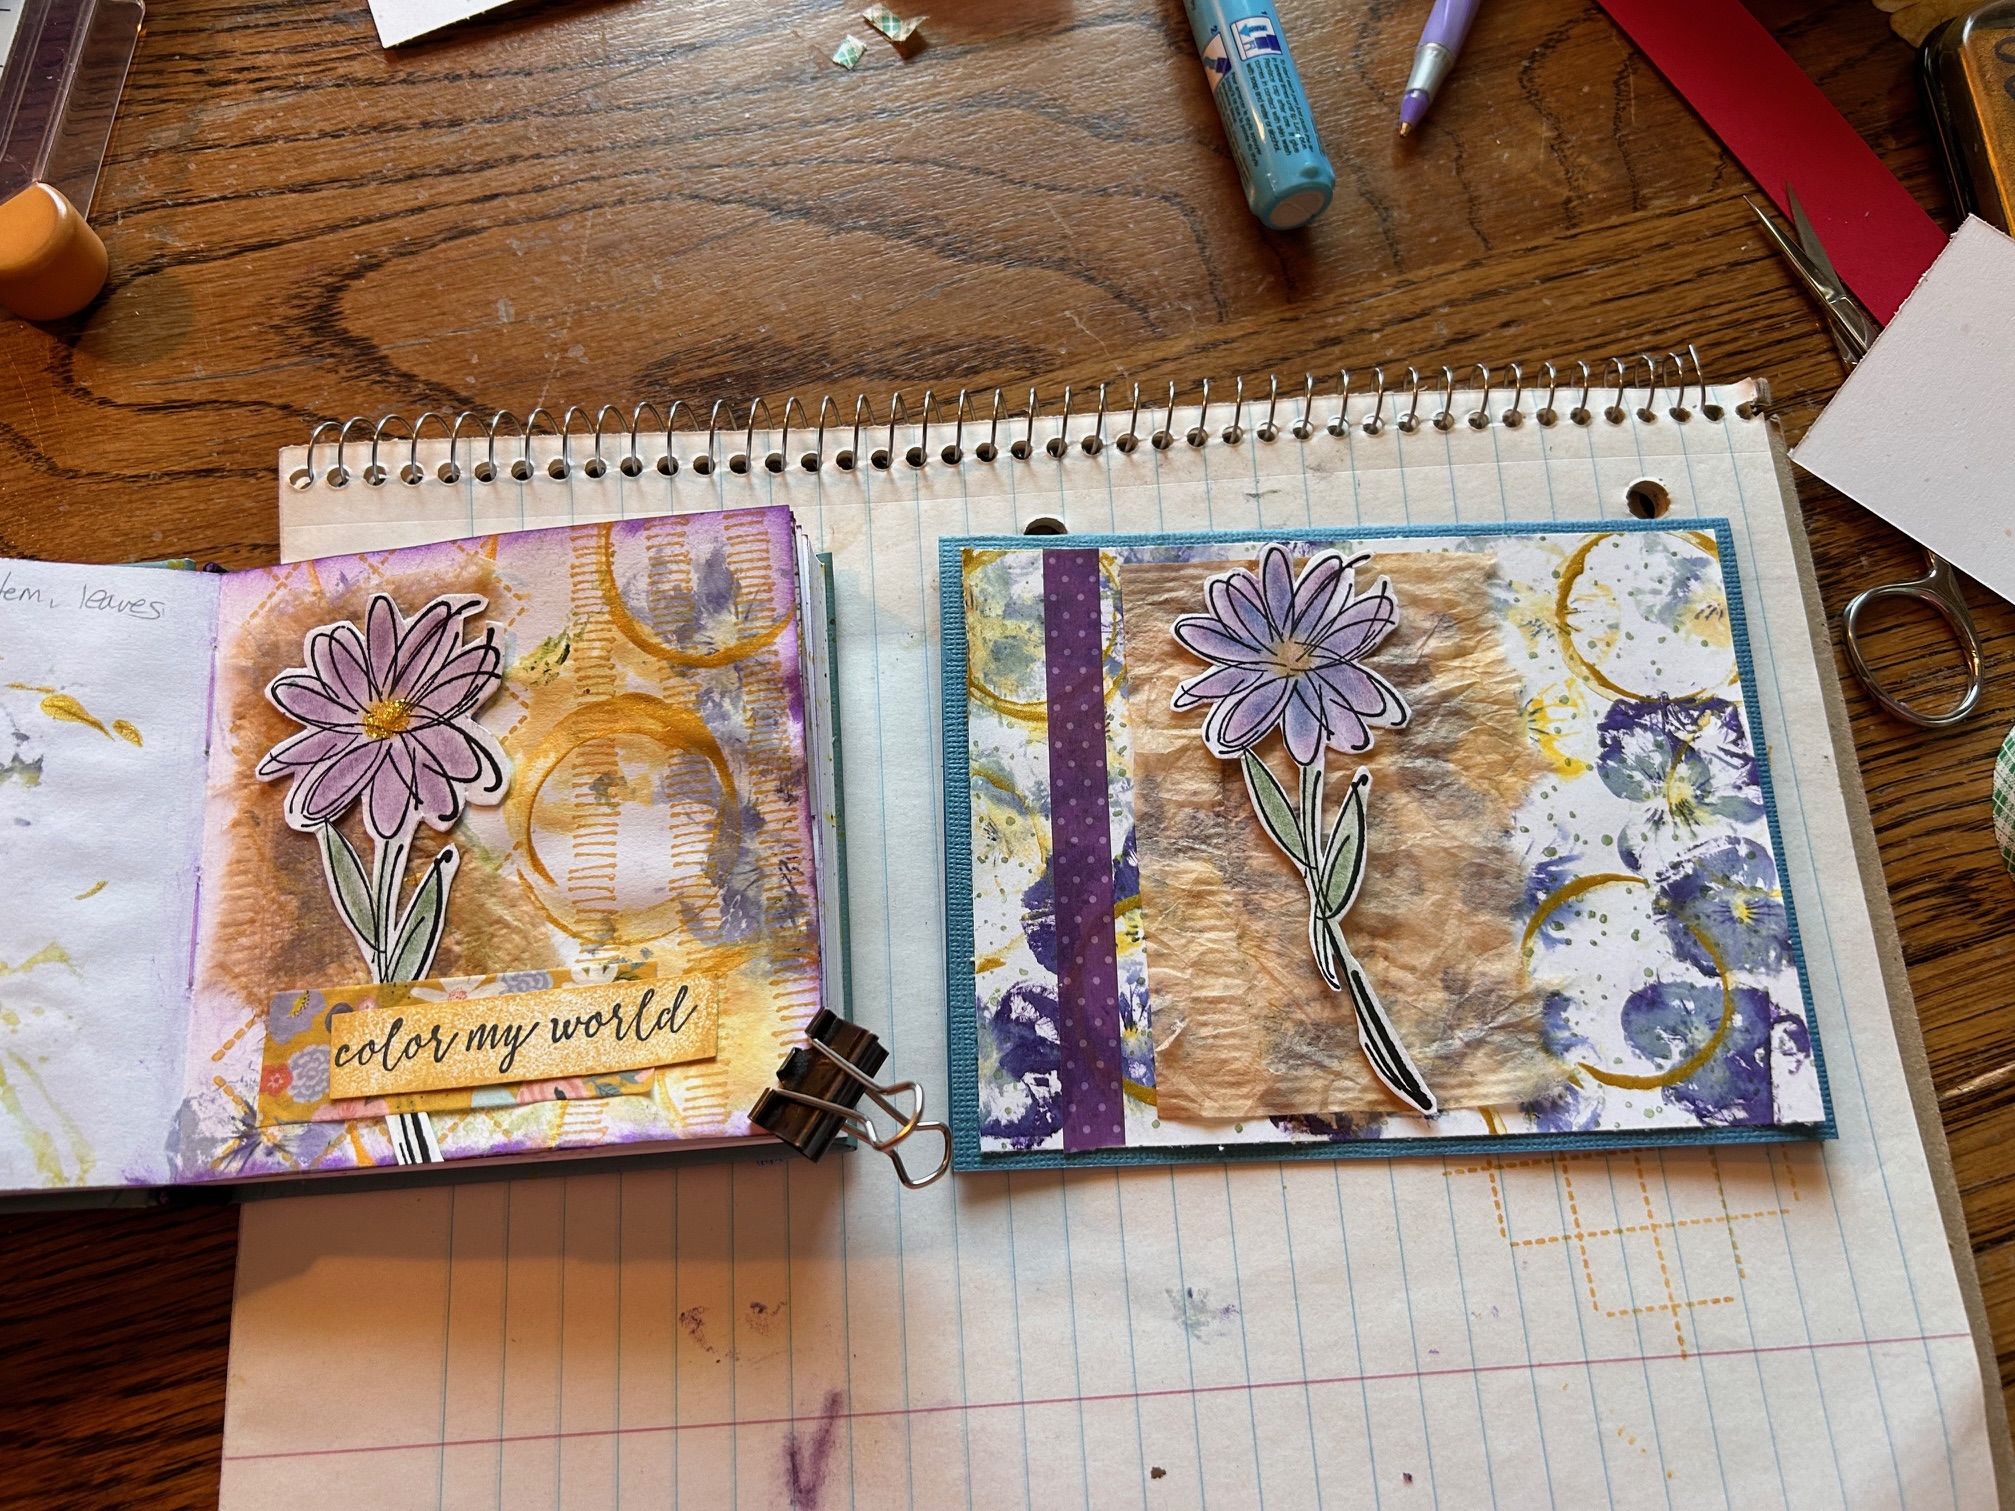
I did go back to the green background page and finished that mixed media project. I LOVE how it turned out! This is one of my favorites so far. The smashed flowers really add texture and the greens tie in so nicely. I saw another creator (several actually) who added circles to their art. So I played with some gold glitter acrylic paint. Wow! Perfect touch. You can see the other materials I used on this page.
Et voila! Stamp pads, rubber stamps, hammered flowers, chalks, washi tape, acrylic paint, colored pencils. Plus a stick for painting and an empty tape-dispenser plastic disc for the circles.
Have you tried flower hammering? Or creating of any kind? What is your favorite trick?
I have these great ideas, inspirations, kernels of dreams. If possible, I jump on them right then, or at least scribble down a note to remind me of the idea so I can (hopefully) look back later and recapture what I was thinking.
Like the beginning of this card idea I started on my carefully rinsed and dried teabag. The sepia tone is perfect for making a card. The leaves pop off the teabag. I love how it looks. But now what? What should I do next? How can I amplify the idea into something beautiful? I am currently stumped on this project, so it sits on the table, waiting.
It’s like that in the picture book world too. I have (what I think is) a great idea, an inspiration, a kernel of a story. A brilliant idea. I jot it down. My mind plays with it, seeking a path to follow, wandering from this to that. My ideas often come to me as a title, a play on words, an interesting character, or a wishful suggestion of a setting or event. And then what? What should I do next? I have file folders and notebooks full of ideas. Waiting.
The creative struggle is real. It’s time consuming. It’s messy. Just ask my honey. But should I let the challenges stop me? When I hit that block-that wall-should I stop? No. Maybe I need to see the wall as the opportunity to take a deep breath, let my mind wander, do something else. Perhaps the wall is just a good resting spot to dream, pray, and let the “now what?” follow its course.
Hey, friends. If you’ve been checking out my blog for any length of time, you may know a few of my hobbies. Gardening. Photography. Books. Reading. Cats. Tote bags. Grands (though they are not this far down the actual list, were I naming things in order of importance). Bible. More books. Art. Chocolate. Travel. Exploring. Seahawks. Oh, wait. I don’t post about the Hawks. But I LOVE watching them. (And it’s a LONG time until football season.) RV living. Hiking. Heart rocks. Beach time. Food. Thrifting. Reading. And books.
Let’s not forget-rubber stamping-the topic of this post.
Last year was an anomaly for rubber stamping. Because of surgeries (2), planning for and enjoying a lovely trip to Europe, taking my grand to the beach when he turned 10 (a Nana tradition for the grands), work, writing, and so many other things, my rubber stamping time was cut to the quick. My stash of handmade greeting cards is in the red. My creative muscles did not get much exercise.
Friends, it’s already the middle of February! This year will probably go as fast as last year, but I hope to exercise those creative muscles much more in 2024. Time to get this hobby in shape!
To kick off the year, I spent a part of last Saturday making a huge mess with my stamping supplies. Those rubber stamping muscles are so rusty! It took me quite a bit to get going. And I have to admit, I create better in the company of fellow creatives-the stamping buddies. Hobbies with friends is best.
But I persevered. I managed to make 8 cards. The struggle was real!
We watched the Super Bowl. I continued my personal Super Bowl of stamping by creating as I watched the game. Ended up with another 20 cards. All one basic design, but I will count each one as a win. My honey uses my cards in his job as chaplain and celebrant. Due to lack of rubber stamping exercise last year, even HIS stash is super low!
I wasn’t going to make valentines. But then I was inspired with one more idea as I was playing with a set of stamps I recently found at a thrift store (see above list of hobbies: thrifting). For one, I’m so proud of myself for actually USING a new/old set! For two, I made 12 more cards!
The mess is real. It’s still spread hither and yon. All worth it.
What hobbies do you enjoy? Let’s hear about it. Maybe I will find a new hobby!
I LOVE rubber stamping. This year was short on time to create, due to so many things. As December approached, I realized I needed to supplement my stash of Christmas cards. So, I dug out the embossing powder and hot gun (because I haven’t used them for quite some time, and I had IDEAS), some favorite (and a few new) rubber stamps, washi tape, colored pencils, and decorative papers.
Fun, fun, fun for me! Living in an RV, space is at a premium. I began by allowing myself just a few craft items to play with in the evening. Embossing pad, powder, and hot gun. Then next evening, OH, I need the cardstock, fun paper, and paper cutter.
After that, OH, I keep forgetting the washi tape and glitter tape. Don’t forget the colored pencils. And yes, a few more stamps to add sentiments inside and to the back of the cards. And that bag of paper scraps would be perfect to add to some of the cards!
LOL. By the end of the week, I had a bunch of new cards, but also several trips of supplies that needed to be returned to the Huckleberry Hutch and put away.
But it was worth it. Fun cards! Merry Christmas to all, and to all a good night!
What craft do you LOVE to do? Especially during the holidays?